For this guide you will need to have unlocked your bootloader, rooted your phone, and installed a custom recovery. For this guide I will be using TWRP custom recovery, but it should the same for other custom recoveries.
I am going to do two guides in here, one for people who already have CyanogenMod installed, and ones who do not. I will start with the one for people who have not previously installed CyanogenMod on their phone.
1. Ok so the first thing you are going to want to do is download the latest CyanogenMod Nightly build. You can get the latest Nightly builds from the CyanogenMod website here:
http://download.cyanogenmod.org/
(make sure you pick the correct model for your phone)
2. You are going to want to download the latest version of Gapps; for those of you who do not know the people who make CyanogenMod are not allowed to give out downloads including google apps. You can download the latest version of gapps from here:
http://wiki.cyanogenmod.org/w/Gapps
Choose the "AFH" option for downloading it instead of the "Torrent" option as the "AFH" option will give you a zip file.
3. Once you have downloaded these two folders you are going to want to locate where you downloaded them, do not extract them. You now need to connect your device to your computer and get access to its internal storage, this should be found in My Computer. Now once you are in the internal storage of your device you are going to want to copy and paste the folders you have just downloaded into the root storage of your phone(do not put them into a folder). It should look like this:
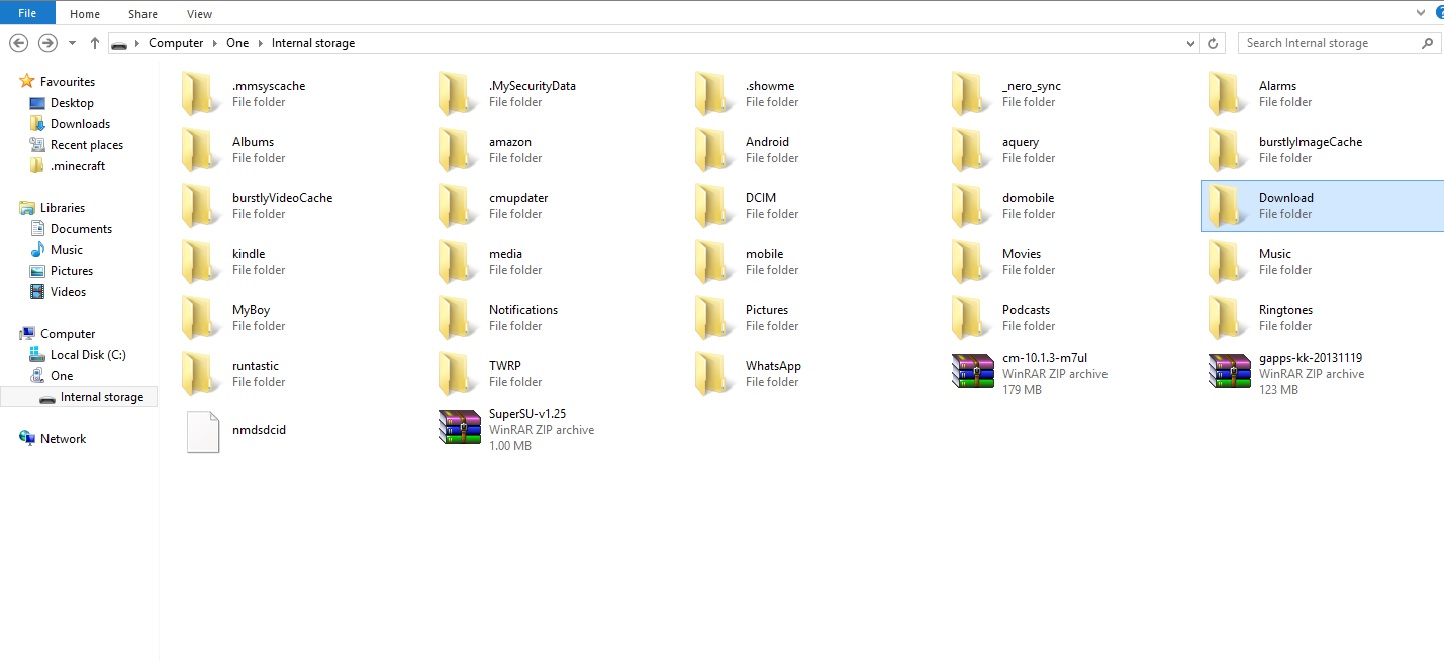
(On mine you can see the zip file is an older version of CyanogenMod, I was just using this for demonstration purposes and I was using the other method to update)
4. The first thing you are going to want to do on your phone is back it up. I recommend you do this in your custom recovery. To do this you are going to need to be able to get into your boot loader. There are two ways to get into you're bootloader:
- The first way is to reboot your phone and when it is turning back on hold down the the volume down button.
- The second way (the easier way in my opinion) is to hold the volume down button, then the power button until your screen turns black. When it turns black release the power button but carry on holding the volume down button.
Now you are in the bootloader it should look like this:

As directed you the volume down button to navigate down until you are on the recovery selection and then press the power button to select it. It will then enter you in into your custom recovery. Click the backup option, select all of the options and swipe to Back Up.

6: Now you can setup your ROM. To do this in your custom recovery select install. You should see a screen like this if you are using TWRP:

Scroll to the bottom and you will see your CyanogenMod download and gapps download:

Then click on the CyanogenMod download and swipe to Confirm Flash and then do the same with gapps.

You should now have CyanogenMod installed. Just reboot your phone and set it up.
Ok so this is the method if you already have a version of CyanogenMod installed.
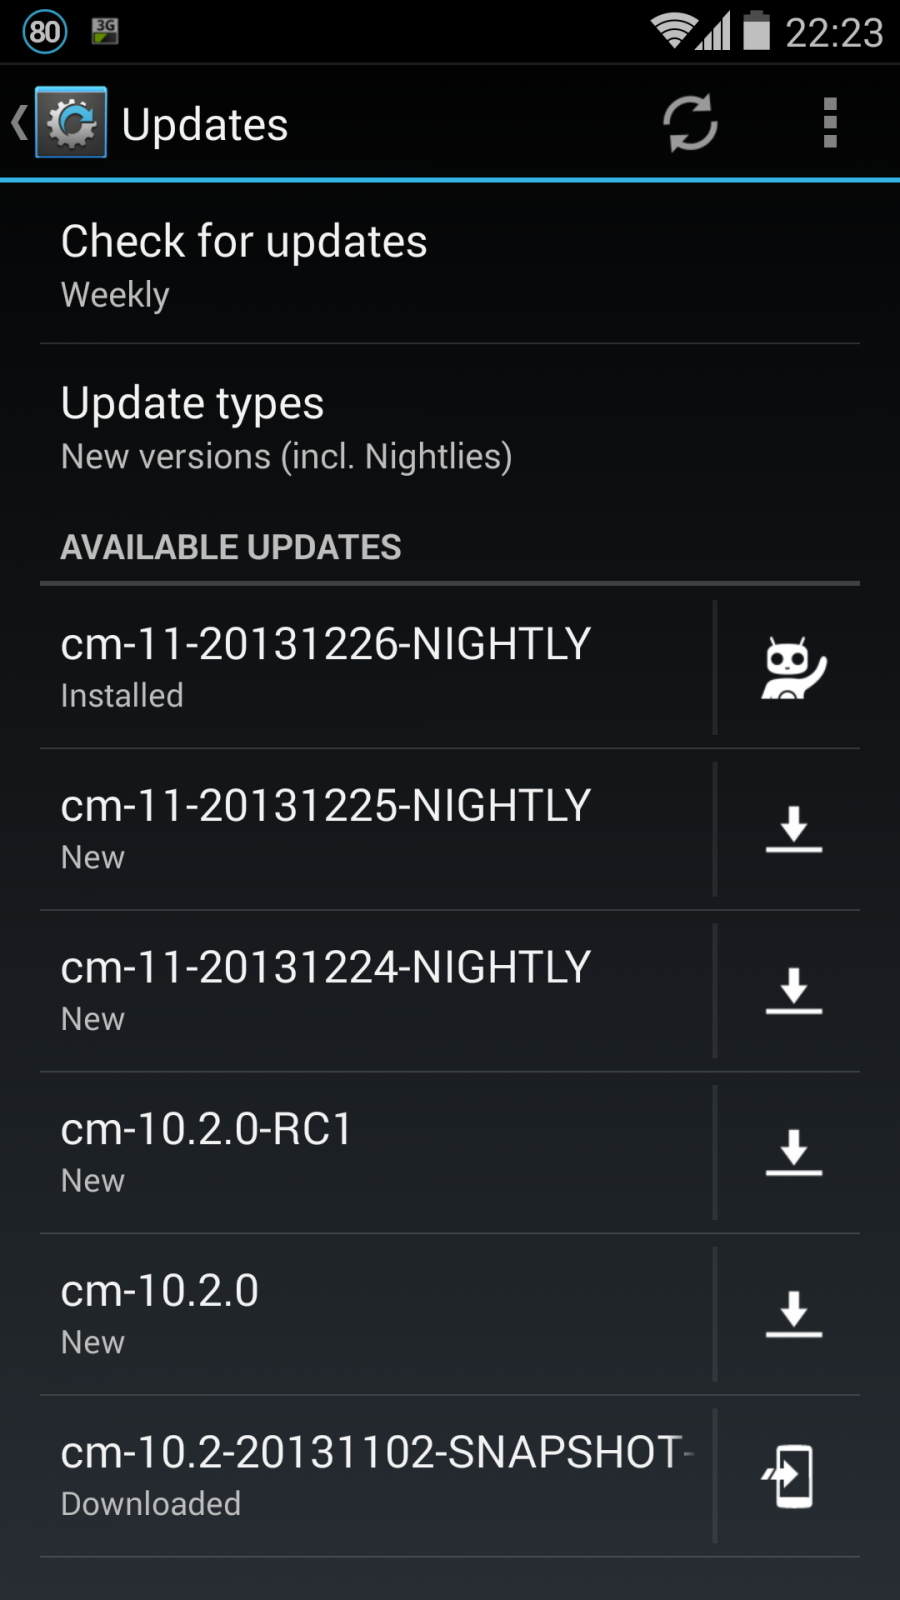
1. If you already have CyanogenMod installed then you are going to want to go into Settings -> About Phone -> CyanogenMod updates and make sure you have "New version (incl. Nightlies)" selected. When you have that selected it should come up with the latest Nightly builds that you can download, choose the latest one and let it download.
2. You are going to want to download gapps, from the same place as for the first tutorial, here:
and once again make sure you download from the AFH link instead of the torrent. This cannot be done with goomanager because it will not give you recent enough versions of gaaps.
3. After you have downloaded gapps connect you phone to your computer and replace your old gapps with the gapps you just downloaded.
4. After you have downloaded gapps and the latest nightly of CyanogenMod click update on the CyanogenMod Nightly and it should take you to this screen:

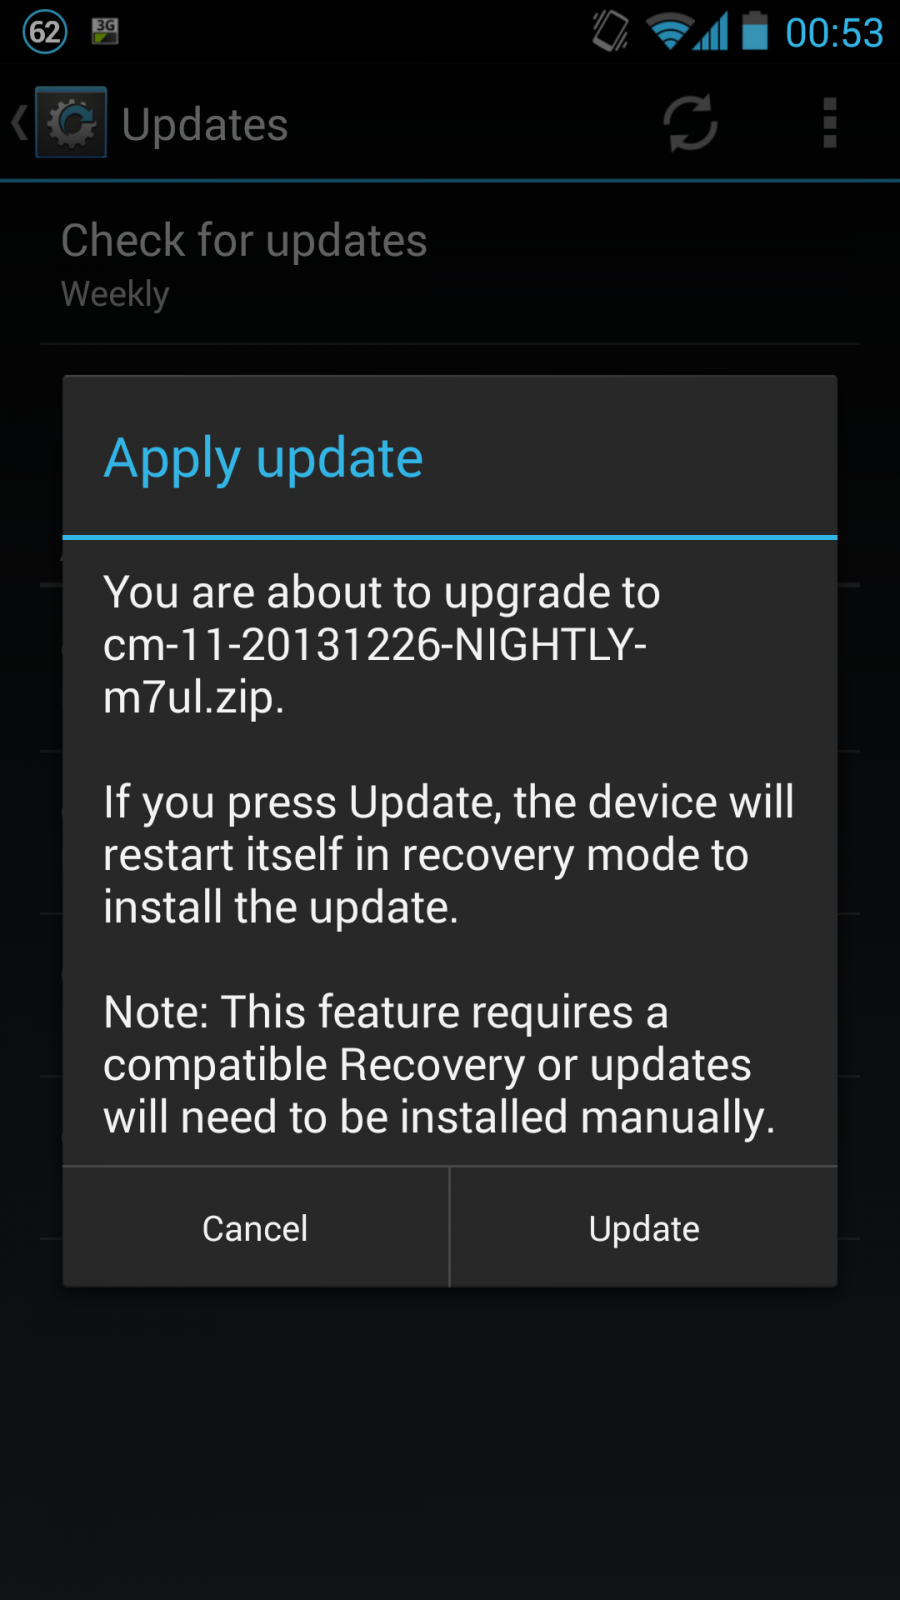
Now this is where you may run into a problem. If, after the process is done and it reboots, you enter back into your custom recovery then you are going to want to do this.
This is most likely happening because your custom recovery is not up to date. To solve this problem all you need to do is download the latest version of your custom recovery and re-install it. I will show you how to do this for TWRP.
You can download the latest version of TWRP here:
Click on "Get TWERP for your device" in the top right hand corner and select your device.
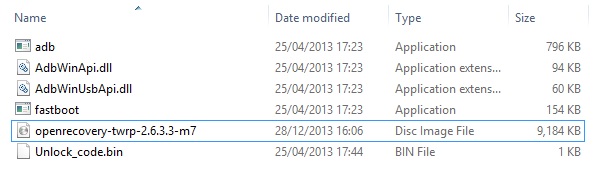
Now to get TWERP on your device before you should have downloaded some drivers for your phone, for me it was called "OneDrivers_fastboot". You are going to want to find this file and then open it. Inside you need a Fastboot file. If you are unsure how to do any of this then look up a guide on how to unlock your boot loader for you specific phone. Inside that Fastboot folder you need to replace the openrecovery TWERP image with the new one you just downloaded.
After you have that in there it should look something like this:
For this next part you are going to want to connect your device to your computer. So now you are going to want to copy and past the name of the .img file. Then hold "shift" and right click inside that window and then click "Open command window here". You should now have a command window open that looks like this:

(I have cropped out the first part as it had some personal stuff)
Now in the command prompt you are going to want to type "fastboot flash recovery" and then paste the name of the image (make sure you add .img to the end of the name if it is not already there). Now it should look like this:
Now press enter and let it run. It should be pretty quick.Now you need to type in one more thing into the command prompt, "fastboot erase cache". That should also be pretty quick.
After that is done the latest version of TWRP should be installed. Now all you need to do is go back into TWRP, go to Install and find the downloads section and click on the download of the Nightly. Let it run and afterwards it will re-boot, it should now work. After it is done re-booting you are going to need to go into TWRP again and flash gapps otherwise none of the google apps will work. Now you should have a completely working version of CM 11.
Sorry for the rubbish camera quality, I do not have a camera at the moment so I was having to use iPad 2 which is not ideal.
If you found this useful please share it and follow me on Twitter, https://twitter.com/TechRandN
No comments:
Post a Comment